
Last Updated: September 17, 2026
Getting the right supplies in place before you open a vial is the single best way to avoid contamination. A common mistake is starting with a bare bench and hoping for the best. That approach ruins more vials than any other error.
Here is what a clean, safe setup looks like:
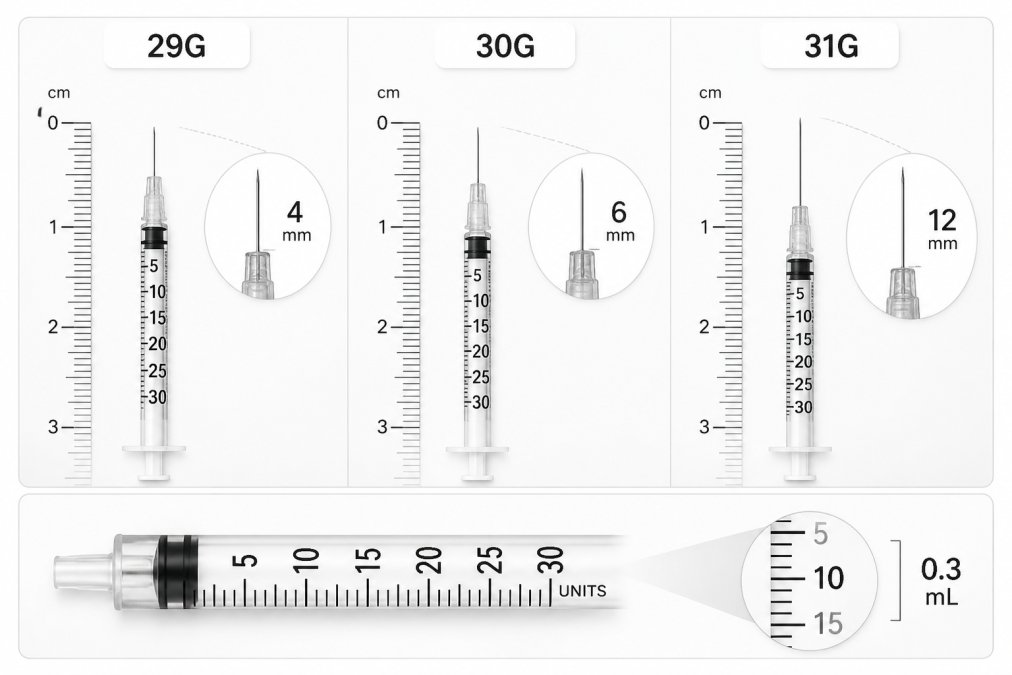
Needle selection is where most written guides go quiet, even though it directly affects comfort, dosing accuracy, and tissue trauma. For subcutaneous work, the two numbers that matter are gauge (thickness) and length.
At Rejuvenation Wellness Solutions LLC, every kit ships with peptides, bacteriostatic dilution water, syringes, and alcohol swabs so nothing is missing when you sit down to work.
Reconstitution means adding a liquid diluent to a lyophilized powder so it dissolves into a usable solution. The whole process takes about 5 to 10 minutes once your workspace is ready. The steps below are the same whether you are running a small home study or a full lab protocol.
A sterile workspace is a clean, draft-free surface wiped down with alcohol before anything is opened. Wash your hands, put on gloves, and lay out every item you need within reach. Keep the room still, since moving air carries contaminants onto open stoppers.
Work in this order:
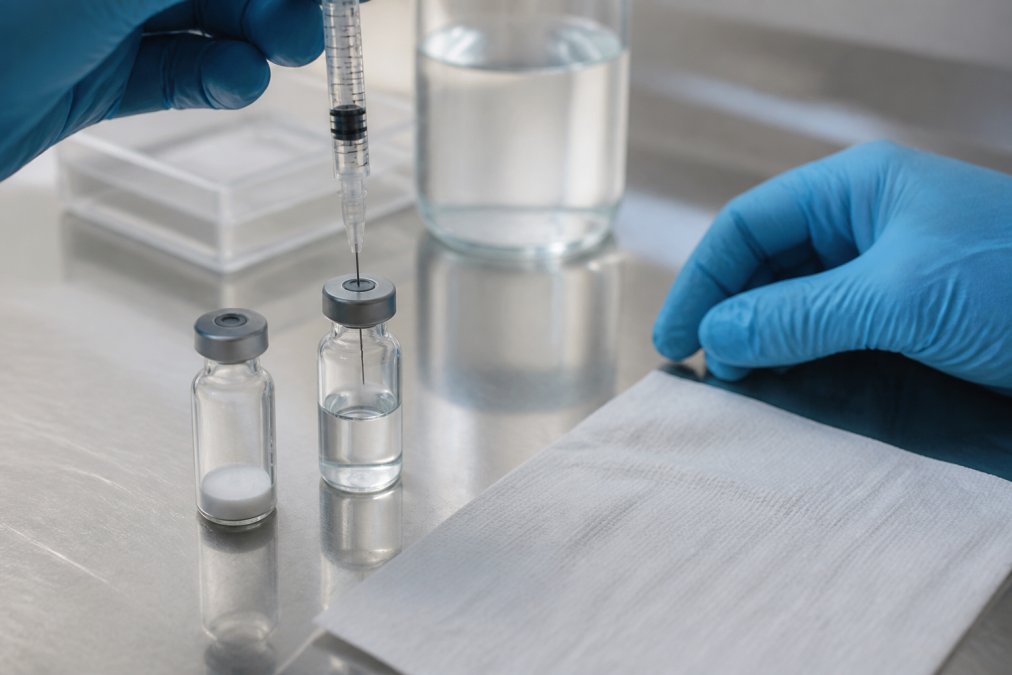
Draw your chosen volume of diluent into the syringe, then insert the needle through the peptide vial’s stopper at a slight angle. Aim the stream at the glass wall, not directly at the powder. Direct pressure can damage the peptide and create foam that is hard to clear.
If the vial was sealed under vacuum, you may hear a soft hiss when the needle enters. That is normal. It means the seal held, which is a good sign for stability.
Bacteriostatic water is sterile water mixed with a small amount of benzyl alcohol, which slows bacterial growth and lets you draw from the same vial more than once. That makes it the standard choice for multi-use peptide vials. Plain sterile water works only when you plan to use the entire vial in one sitting.
The trade-off is simple:
A peptide reconstitution calculator converts your vial’s total peptide mass and your added diluent volume into a dose per unit on your syringe. It removes the guesswork from unit conversion, which is where most dosing errors start. But a calculator is only as good as the numbers you feed it, so it helps to understand the math underneath.
Most U.S. insulin syringes are marked in units, where 100 units equals 1 mL. That single fact drives every conversion you will do:
You control the concentration by choosing how much diluent to add. A common pattern is to pick a diluent volume that makes your target dose land on a clean unit mark:
Most miscalculations trace back to a few repeatable mistakes:
Write the concentration and the date on the vial label the moment you finish mixing. A vial with no label is a vial you cannot safely use later.
If you want to double-check a calculator, run the math by hand once. If the two disagree, trust the hand calculation and recheck your inputs.
Reconstituted peptides belong in the refrigerator, not the freezer. Cold storage slows peptide degradation and keeps the solution stable for longer. Keep the vial upright, capped, and away from light.
A few storage rules worth following:
A cloudy or precipitated solution usually means one of three things: the powder was agitated too hard, the diluent was added too fast, or the peptide is not fully soluble in that diluent. Most guides skip this problem entirely, but it is common and often fixable.
Try these steps in order:
Used needles, syringes, and contaminated vials go into a puncture-resistant sharps container, never into household trash. This is one of the most overlooked steps in peptide work, and it is also one of the most important for safety.
Follow these rules:
Most ruined vials come down to a handful of avoidable errors. Fix these and your results get more consistent right away.
Common mistakes include skipping aseptic technique, using the wrong diluent, spraying liquid directly onto the powder, and storing the vial improperly. Always wipe the stopper with an alcohol swab, let it dry, and inject the diluent slowly down the vial wall. Avoid shaking; swirl gently instead. Also, failing to calculate the correct draw volume can lead to inaccurate dosing. Double-check your math and use a peptide reconstitution calculator to reduce errors.
The volume of bacteriostatic water depends on the peptide mass and your desired concentration. For example, adding 1 mL to a 5 mg vial yields 5 mg/mL. If you need a lower concentration for accurate small doses, use 2 mL for 2.5 mg/mL. Always use a peptide reconstitution calculator to determine the exact volume, and record it for future reference. Never guess, as it affects dosing accuracy.
Reconstituted peptides are less stable than lyophilized powder. Without refrigeration, they can degrade quickly, losing potency within days or even hours depending on the peptide. Store vials at 2-8°C (36-46°F) and protect them from light. Always check the Certificate of Analysis for specific storage recommendations.
Work in a clean, draft-free area and clean the surface with 70% isopropyl alcohol. Wash your hands and wear gloves. Swab the vial stoppers and your workspace. Use a new syringe and needle for each vial. Avoid touching the needle or the rubber stopper. Once reconstituted, keep the vial sealed and store it properly. Following aseptic technique minimizes the risk of contamination.